|
(0)--fm.thing.net--(0)
|
(0)
How to build a 1W transmitter Tetsuo style
Step five : the cool stuff - soldering the components to the board
Estimated time for step two : 10-15 minutes
You will need the following:
Solder Iron
Solder
Copper Board
Components (Electrolytic Capacitor)
Tweezers
Patience
This is where the action starts. We recommend before you start this bit you have a break for a few minutes, center yourself, focus on the task ahead and maybe try this to relax[x].
A) Ok...ready?. First get the Electrolytic Capacitor, 1-4.7 MF. We start with one of the most trickiest components just to get you going...So, look at the component and you will see somewhere a '-' (minus sign). The connection point directly under that symbol will need to be soldered directly to the top of square A and the other point will need to be soldered to the top of square B.
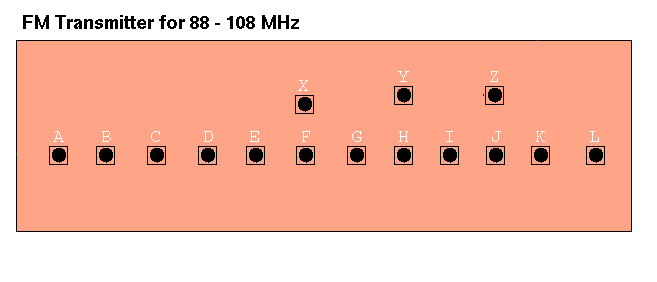
B) Start with soldering the negative connector to square A [x].

i) bend the two connectors on the capcitor so they are 180 degrees apart
ii) hold the negative connector ontop of the solder on square A with the tweezers. It is always important to make the solder connection at the shortest point possible between the solder, and the component.
iii) hold the soldering iron on top of the solder on Square A and wait until you see the solder go 'silvery' which means that it has melted.
iv) force the connector down into the melted solder, and take the soldering iron away.
v) hold the capacitor in place until the solder has hardened again.
Now you should have a good connection between the capacitor and the soldered square A. To check just pull the capacitor and check to see how solid the connection is, if the capcitor comes away then start again.
C) Now you must do the same to the other side of the capacitor and square B. When you ahve finished it should look like this[x].
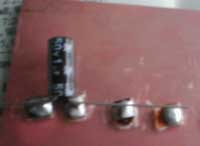
D) Cut off the excess wire from the component, cut this as close to the soldered joint as possible.
Then proceed to STEP SIX.